This is the ORIGINAL post.
We all have those moments in tech where we stumble across a setting and think, “Wait, how did I not know this?”
Well, let me share mine with you — because if you’re dealing with AWS networking, this might save you a couple of hours or even days of frustration.
What Happened
I recently created a new subnet manually, and everything seemed perfectly set up. I configured my route table to point to the Internet Gateway (IGW). I reused an old Launch Template for EC2 instances. But after launching a new instance, surprise, surprise — it had no access to the internet.
I went through the configurations and I thought it was just a minor thing:
- Internet Gateway? ✅
- Route Table? ✅
- Security Groups? ✅
They are all set good!
At this point, I thought, “What on earth am I missing?”
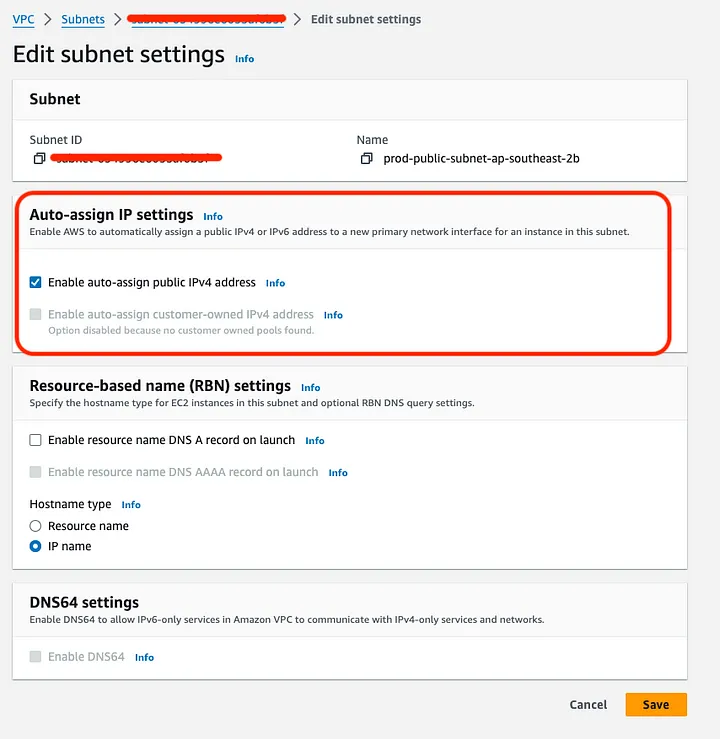
The Missing Piece: Auto-Assign Public IP in Subnet Settings
After diving deep, I found the issue buried where I didn’t expect it — in the subnet settings.

When you create a subnet manually, the ‘Auto-assign public IPv4 address’ option is disabled by default. That means even though everything in my route and security configurations was fine, the instances launched in that subnet would not be assigned with a public IP, which is essential for internet connectivity.
I originally assumed this would be something I could tweak in my Launch Template, but nope! The public IP assignment is handled per subnet, and there’s no way to override that from the Launch Template. If it isn’t enabled in subnet settings, your instances won’t get public IP no matter what you do in the template. Sneaky, right?
Key Takeaway
This brings us to an important networking concept in AWS:
- Even if your static route in the route table points to an Internet Gateway, your EC2 instance won’t be able to connect to the internet without a public IP.
When you manually create subnets, remember to enable the ‘Auto-assign public IPv4 address’ option if you plan to launch instances which requires internet connection. You can also assign an Elastic IP to the instance manually, but that adds a bit more overhead.
Why This Matters: A Parallel to Lambda Networking in VPC
This issue reminded me of a similar experience I had when configuring Lambda functions within a VPC. Even though the Lambda function could access internal resources, I had to set up an NAT Gateway to allow internet access.
It’s the same principle here: Just because you’ve got a route to the internet doesn’t mean your instance (or Lambda) knows how to get there without the right IP setup.
If you’re interested, I wrote a detailed piece on <Something You May Not Know About AWS Lambda With VPC> for your further reading.
My Thoughts
AWS networking has a lot of moving parts, and it’s easy to miss small but critical settings like the Auto-assign public IP in subnets. The more I use AWS, the more I understand how important these seemingly insignificant details can be.
So if you ever run into a similar issue, I hope this post saves you from some troubleshooting headaches.
If you’ve got any similar stories or hidden AWS settings you’ve discovered, drop a comment or shoot me a message. We’re all in this together!
Finally
Please follow me on Medium if you are interested in Cloud, DevOps, automation, programming, and any tech topics. I would also appreciate it if you could give me a clap.
Your comments are always welcome.
Thanks.


